Initial Setup
This article covers how to set up app storage, configure global settings, and prepare TrueNAS to deploy applications. For details on discovering, installing, and managing individual applications, see Managing Apps and individual app tutorials.
You must choose a pool before you can install an application. See Choosing the Apps Pool below for more information about apps pool selection.
TrueNAS apps use Docker containers and Docker Compose for deployment. Docker is an open-source software that manages images and container deployments.
The default system-level settings are found in Apps > Settings.
Use the Configuration dropdown to access the Choose Pool, Unset Pool, Manage Container Images, and Settings options.
For more information on screens and screen functions, refer to the UI Reference article on Apps Screens. Use the dropdown to select your installed TrueNAS version.
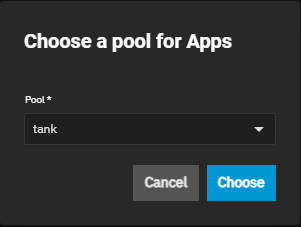
You are prompted to select the pool for apps the first time you click on Apps. You can exit out of this if you are not ready to deploy apps or do not have a pool configured for apps to use for storage. You must set the pool before you can add any application.
Select the pool and click Save. If you close the dialog to set the pool later, click Configuration > Choose Pool to set the pool.
We recommend users keep the container use case in mind when choosing an applications pool. Select a pool with enough space for all the application containers you intend to use.
For app stability and performance, we recommend using SSD storage for the apps pool due to their faster speed and resilience for repeated read/writes.
TrueNAS (24.10 and later) creates a hidden ix-apps dataset on the apps pool and mounts the hidden directory at
See Understanding App Storage Volumes for more information about the ix-apps dataset and other app data storage volumes.
(TrueNAS 25.10 and later)
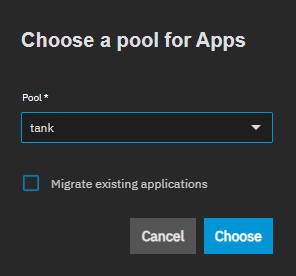
If you select a new pool in the Pool dropdown after previously configuring the apps service, the dialog displays the Migrate existing applications option.
Click Migrate existing applications to migrate all installed applications to the new applications pool.
Migrate existing applications only affects data saved in the apps dataset, such as the app image and iXvolume storage. Data in mounted host paths is not migrated.
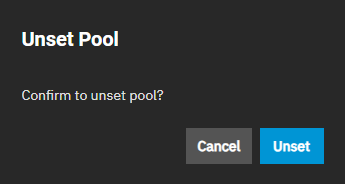
To remove the apps pool configuration, click Unset Pool on the Settings menu.
Click Unset to confirm. This turns off the apps service until you choose another pool for apps to use.
To sign in to a Docker registry, click Configuration > Sign-in to a Docker registry to go to the Docker Registries screen.
Signing in to a registry, such as Docker Hub, is not required but allows you to avoid rate limiting issues or connect to a private registry.
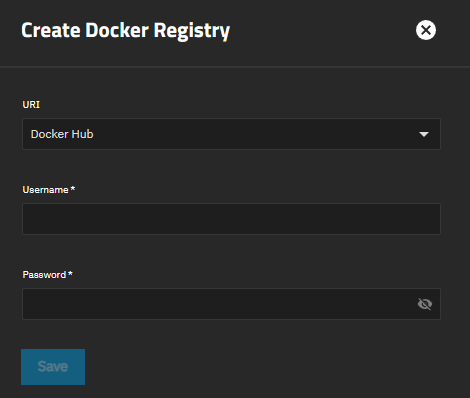
Click Add Registry to open the Create Docker Registry panel.
Use the URI dropdown to select the Uniform Resource Identifier (URI) type for the registry. Options are Docker Hub or Other Registry. The URI dropdown is hidden when a Docker Hub registry record is already configured.
To sign in to Docker Hub, enter the user name and password of an existing Docker Hub account.
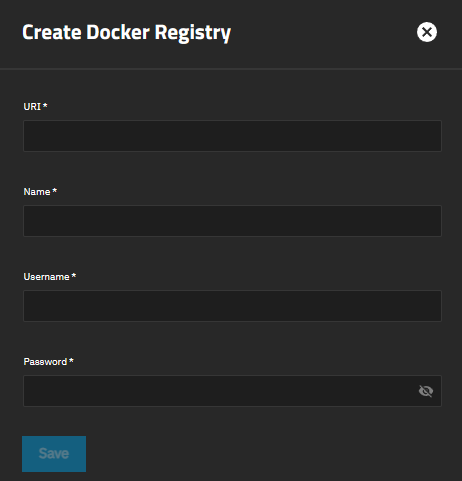
To sign in to another registry, select Other Registry from the dropdown or click Add Registry again after signing in to Docker Hub.
Enter a valid Uniform Resource Identifier (URI) for the registry, for example https://index.docker.io/v1/.
Then enter a display name for the registry record in TrueNAS.
Enter the user name and password of an existing account on the registry.
Click Save to sign in and create the registry record.
Registry mirrors provide local caching of Docker images to improve performance and reduce bandwidth usage when multiple systems pull images from public registries. Use registry mirrors to avoid hitting rate limits on public registries like Docker Hub.
To configure registry mirrors, go to Apps > Configuration > Settings to open the Settings screen.
In the Settings screen, locate the Registry Mirrors section. This section contains two fields for configuring different types of registry mirrors:
Use Secure Mirror URLs to configure HTTPS-enabled registry mirrors that provide secure connections. Secure mirrors require HTTPS and a valid certificate.
Click in the Secure Mirror URLs field.
Type the registry mirror URL using HTTPS format (e.g.,
https://my-docker-mirror-host).Press Enter to add the URL as a chip.
Repeat to add additional secure mirror URLs.
Use Insecure Mirror URLs to configure mirrors that use HTTP or HTTPS with self-signed certificates.
Insecure registry mirrors can use HTTP connections without encryption or HTTPS with self-signed certificates. Only use insecure mirrors in trusted network environments.
Click in the Insecure Mirror URLs field.
Type the registry mirror URL (e.g.,
http://my-insecure-mirror-hostorhttps://my-mirror-with-self-signed-cert).Press Enter to add the URL as a chip.
Repeat to add additional insecure mirror URLs.
Click Save to apply the configuration.
Registry mirrors are used in addition to the original registry. When a mirror is unavailable, Docker falls back to pulling images directly from the original registry.
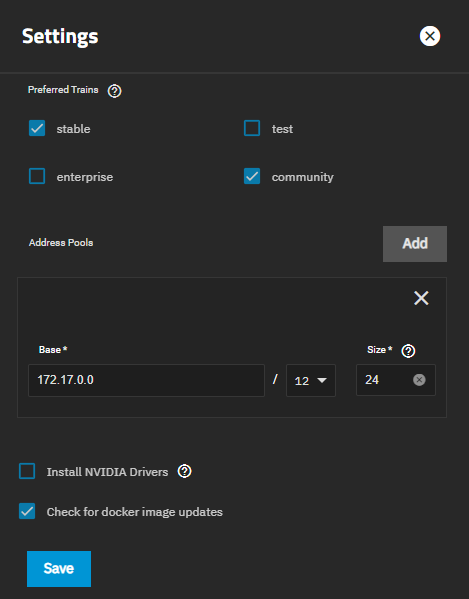
Click Configuration > Settings to open the Settings screen, which contains options for setting app trains, configuring app networking, installing NVIDIA drivers (if compatible hardware is present), and allowing TrueNAS to monitor for Docker image updates.
TrueNAS applications are available in three catalogs (trains):
Applications validated by TrueNAS Engineering for Enterprise deployment on TrueNAS Enterprise-licensed systems.
These applications receive either Enterprise Deployment Support or full Enterprise Application Support from the TrueNAS Support team.
Applications tested by the TrueNAS Engineering team and chosen based on their functionality and integration with TrueNAS.
TrueNAS Engineering can provide software maintenance for these applications, but the TrueNAS Support team does not offer continual support. Issues for these applications are tracked separately and addressed on a best-effort basis in the community forums and other user-driven resources.
Applications proposed and maintained by the TrueNAS community without official TrueNAS support.
Issues for these applications are tracked separately and addressed on a best-effort basis in the community forums and other user-driven resources.
Some apps proposed by community members might be adopted as official Stable train apps.
See App Support Definitions for more information on application support levels.
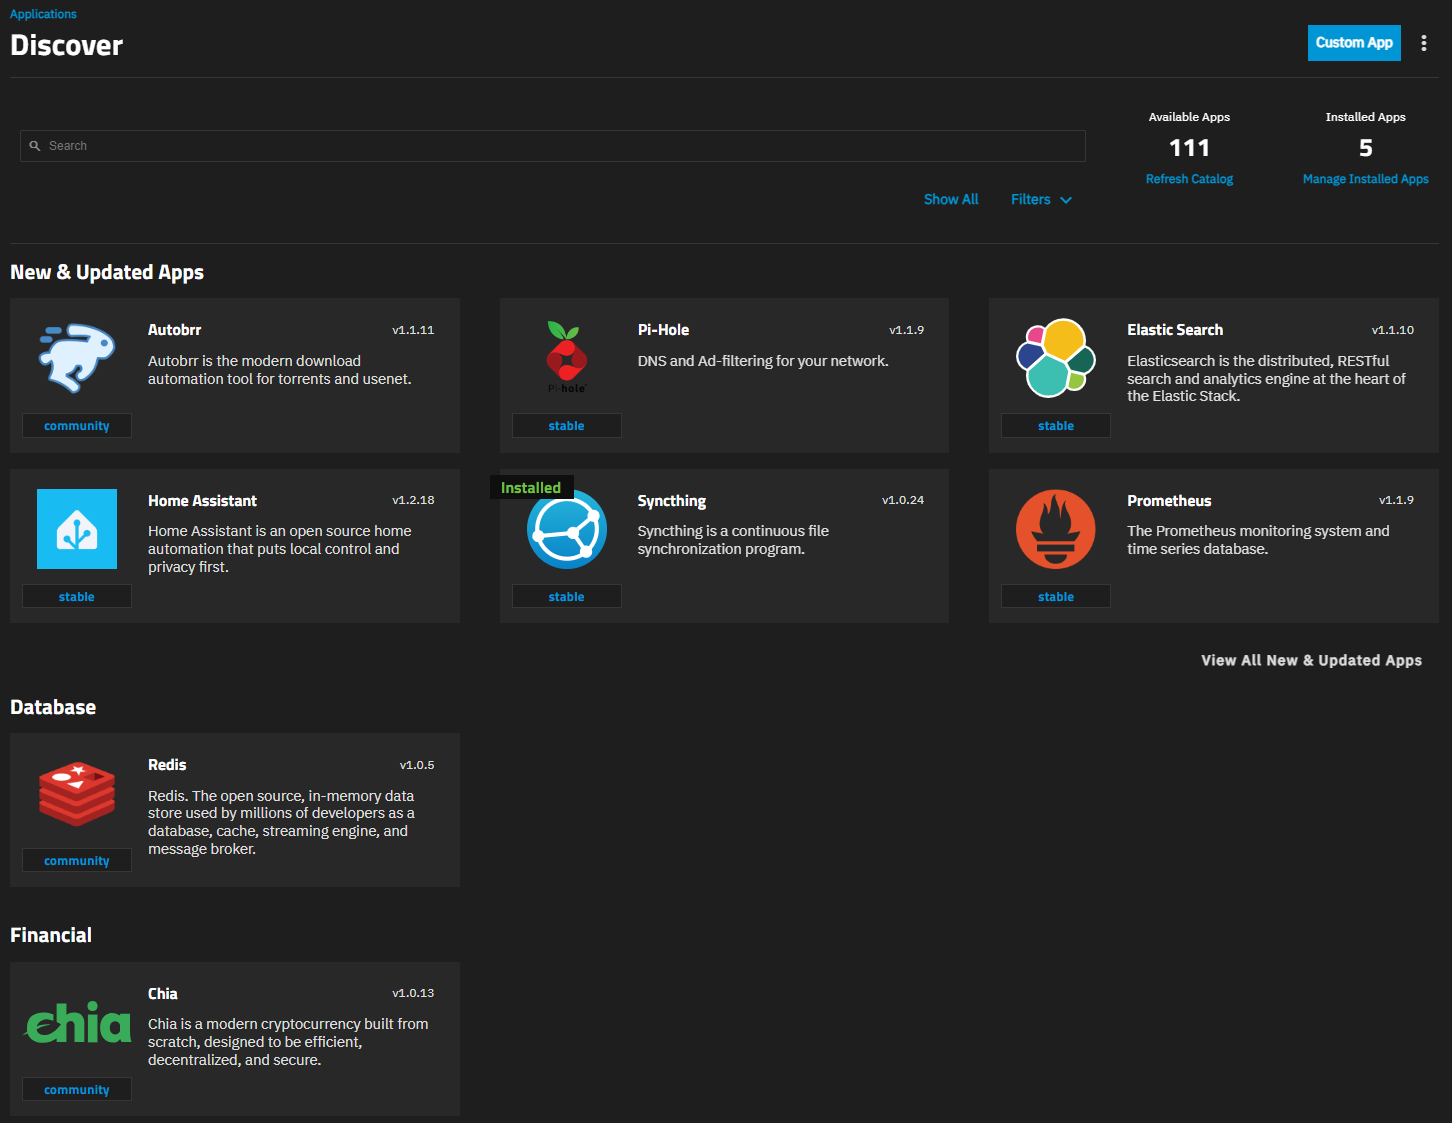
TrueNAS Community Edition systems populate the Discover apps screen with the Stable and Community catalogs populate by default. TrueNAS Enterprise-licensed systems show the Enterprise catalog.
Users can change the apps displayed on the Discover screen by adding or removing trains. To add or remove a train, Settings on the Configuration dropdown list to open the Settings screen.
Select the Preferred Trains checkbox(es) for the train(s) to include, then click Save.
After making a change, go to the Discover screen and click on Refresh Catalog to pull the catalog from the repository and refresh it in TrueNAS.
To remove a train from the catalog, deselect the checkbox for the train on the Settings screen, then click Save. You must have at least one train selected.
Go to Apps > Installed, click Configuration, and select Settings.
To add another range of IP addresses, click Add to the right of Address Pools, then select a range from the dropdown list of options, and enter the desired value in Size.
Base shows the default IP address and subnet, and Size shows the network size of each docker network that is cut off from the base subnet.
This setting replaces the Kubernetes Settings option for Bind Network in 24.04 and earlier. Use to resolve issues where apps experience issues where TrueNAS device is not reachable from some networks. Select the network option, or add additional options to resolve the network connection issues.
Give special consideration when TrueNAS is installed in a VM, as VMs are not configured to use HTTPS.
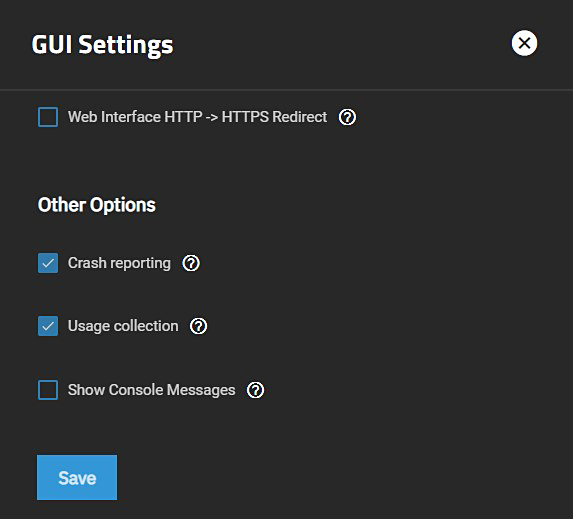
Enabling HTTPS redirect can interfere with the accessibility of some apps. To determine if the HTTPS redirect is active, go to System > General Settings > GUI > Settings and locate the Web Interface HTTP -> HTTPS Redirect checkbox.
To disable HTTPS redirects, clear the checkbox and click Save, then clear the browser cache before attempting to connect to the app again.
TrueNAS allows configuring an Active Directory or LDAP server to handle authentication and authorization services, domain, and other account settings. Identify your existing Kerberos realm and keytab information. You might need to supply your LDAP server host name, LDAP server base and bind distinguished names (DN), and the bind password.
TrueNAS is configured with default port numbers, but you can change these. Before making a port number change, refer to the Default Ports for a list of used and available ports before changing default port assignments.
TrueNAS 24.10 (and later) users must manually install drivers from the TrueNAS UI.
Go to Apps > Installed and click on the Configuration.
Click on Settings to open the Settings configuration screen.
Select Install NVIDIA Drivers, which is available to users with compatible GPUs.
Select Install NVIDIA Drivers, and click Save.
Select Check for docker image updates (selected by default) to enable TrueNAS to periodically check for Docker image updates. This applies to all Docker images present on the system for either catalog or custom applications. Disable to prevent TrueNAS from monitoring for upstream image updates.
Ready to move on? Continue your TrueNAS Apps journey below.

Learn more about initial setup, securing apps, contributing apps and resources, and more.

How to find, install, and manage applications in TrueNAS.

Browse the full catalog of applications available in TrueNAS!

View featured applications, the most deployed, and the newest applications available in TrueNAS.


