

Installing Apps
This article covers installing applications from the TrueNAS catalog. For details on how to set up app storage, configure global settings, and prepare TrueNAS to deploy applications, see Initial Setup. For custom applications, see Installing Custom Apps.
The Installed applications screen displays Check Available Apps before you install the first application.

Click either Check Available Apps or Discover Apps to open the Discover screen.
Search for the application widget, then click on that widget to open the information screen for the app and access the installation wizard.
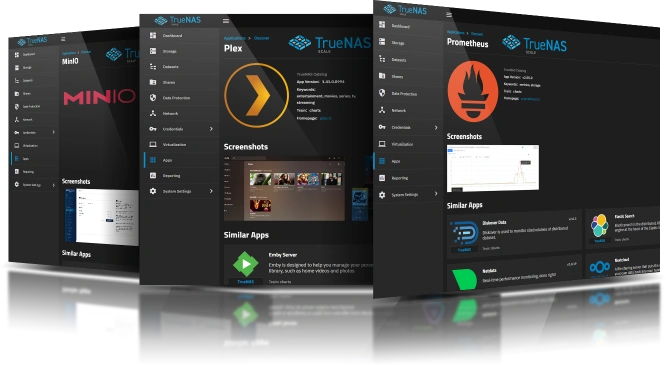
After clicking on an app widget on the Discover Apps screen, the information screen for that app opens. Click Install to open the installation wizard for the application.

The installation wizard configuration sections vary by application, with some including more configuration areas than others. Each application tutorial provides information on steps to take before launching an app installation wizard, but if a tutorial does not exist, click Install on the app information screen to open the wizard. Review settings ahead of time to check for required settings and then exit the wizard to do the necessary steps before returning to install the application. Click Discover on the breadcrumb at the top of the app wizard screen to exit without saving.
Apps submitted and maintained by community members using the Custom App option might not include an installation wizard. Refer to tutorials created and maintained by the community for more information on deploying and using these applications.
TrueNAS applications generally include these basic setting sections:
Application Name shows the default name for the application.
If deploying more than one instance of the application, you must change the default name.
Do not change the Version number for official apps or those included in a TrueNAS catalog. When a new version becomes available, the Installed application screen shows an update alert, and the Application Info widget shows an Update button. Updating the app changes the version to the currently available release.
Application Configuration shows required and optional settings for the app. Typical settings include user credentials, environment variables, additional argument settings, the name of the node, or even sizing parameters.
User and Group Configuration shows the user and group ID for the default user assigned to the app. If not using a default user and group provided, add a new user to manage the application before using the installation wizard, then enter the UID in both the user and group fields. This section is not always included in app installation wizards.
Network Configuration shows network settings the app needs to communicate with TrueNAS and the Internet. Settings include the default port assignment, IP addresses, and other network settings.
If changing the port number to something other than the default setting, refer to Default Ports for a list of used and available port numbers.
Some network configuration settings include the option to add a certificate. Create the certificate authority and certificate before using the installation wizard if using a certificate is required for the application.
Applications include additional port and IP configuration options for network control.
Port Bind Mode controls how application ports are exposed. Publish port on the host for external access is the default setting that allows external connections from your network or the internet. Expose port for inter-container communication allows only other applications on the same TrueNAS system to connect. None does not expose the port, making it inaccessible from outside the application container.
Host IPs restricts which IP addresses can receive incoming connections to the application when using Publish port on the host for external access mode.
Default behavior (empty): The port binds to all available network interfaces (0.0.0.0).
Specific IP binding: Add one or more IP addresses to restrict which network interfaces can receive connections. You must first configure alias IP addresses in the TrueNAS network configuration before they appear in the Host IPs dropdown list. Click Add to select from available configured IP addresses.
Host IP binding only controls incoming traffic to the application. Outgoing connections from the application still use the host’s primary IP address by default, not the specified alias IP.
To add alias IP addresses, see Adding Static or Alias IP Addresses.
Host Network enables direct host network access for the application.
Host Network mode is not recommended for most applications. Enable only when specifically required.
When enabled, the application shares the host’s network stack directly, reducing network isolation but potentially required for network discovery or legacy applications.
Storage Configuration shows options to configure storage for the application. Storage configuration can include the primary data mount volume, a configuration volume, postgres volumes, and an option to add additional storage volumes. The primary mount volumes have two options:
- ixVolume creates a storage volume inside the hidden ix-apps dataset. This is the default setting.
- Host Path allows you to select an existing dataset created for the application. It shows additional fields for selecting the path to the dataset and adding the mount point.
ixVolumes are not recommended for permanent storage volumes, they are intended for rapid storage for a test deployment of the container. We recommend adding datasets and configuring the container storage volumes with the host path option.
Host paths add existing dataset(s) as the storage volumes. You can configure the datasets before beginning the app installation using the wizard or click Create Dataset in the app install wizard.
Some applications require specific storage volumes for configuration and other data. Apps with these requirements indicate this in the wizard UI or details screen. Refer to tutorials for specifics.
Depending on the app, storage options can include:
- ixVolume
- Host path
- SMB share
- Tmpfs (Temporary directory created on the RAM)
See Understanding App Storage Volumes for more information.
After configuring required storage volumes you can add additional storage volumes. To configure additional storage volumes for the application, click Add to select the type of storage to configure.
An SMB share option allows you to mount an SMB share as a Docker volume for the application to use. If the application requires specific datasets or you want to allow SMB share access, configure the dataset(s) and SMB share before using the installation wizard.
ixVolumes do not require setting up an Access Control List (ACL) and Access Control Entry (ACE) in the app configuration settings, but host paths do. After entering the path inside the container in Mount Path, select Enable ACL. Browse to or enter the path to the dataset in Host Path. Click Add next to ACL Entries to display a set of ACE fields. Use ID Type to select whether the ACE is for a user or a group. Enter the UID or GID in ID and adjust the permissions level in Access.
Refer to the app Run As Context on the app details screen for default ID requirements. A user or group ID does not need to exist locally on TrueNAS or match the name configured in the container. You do not need to add these users in Credentials to add the UID/GID as an ACE for the host path dataset.
If the app has run-as users, you need to add an ACL entry for these users on the appropriate host path(s). For example, an app with multiple containers might include run-as users for the app itself, a redis container, and a postgres container. In this case, add an ACE for the app run-as user to host path(s) for the app itself, add an ACE for the redis run-as user to the redis storage host path, and select the Automatic Permissions option to add permissions for the postgres run-as user to the postgres storage dataset. Failing to configure host path ACLs prevents the app from deploying!
Select Force Flag to allow TrueNAS to update the application to the next version. This allows TrueNAS to write ACL entries to the storage volume if it has existing data in it. Force Flag is required to edit or update an existing application.
Resources Configuration shows CPU and memory settings for the container pod. In most cases, you can accept the default settings, or you can change these settings to limit the system resources available to the application.
Some apps include GPU settings if the app allows or requires GPU passthrough.
Users with compatible hardware can pass through a GPU device to an application for use in hardware acceleration.
GPU devices can be available for the host operating system (OS) and applications or can be isolated for use in a Virtual Machine (VM). A single GPU cannot be shared between the OS/applications and a VM.
The GPU passthrough option shows in the Resources Configuration section of the application installation wizard screen or the Edit screen for a deployed application.

Click Passthrough available (non-NVIDIA) GPUs to have TrueNAS pass an AMD or Intel GPU to the application.
Select NVIDIA GPU(s) displays if an NVIDIA GPU is available, with installed drivers. Click Use this GPU to pass that GPU to the application.
After clicking Install on an application wizard screen, the Installed applications screen opens showing the application in the Deploying state before changing to Running. Applications that crash show the Crashed status. Clicking Stop changes the status to Stopping before going to Stopped. Click Start to restart the application.
The screen defaults to selecting the first app row listed on the Applications table and showing the application widgets that first app. To modify installed application settings, click on the app row in the Applications table, then click Edit on the Application Info widget.
Settings available for each individual app can differ. Refer to individual app resources in the Catalog for more details on configuring application settings.
Apps stuck in a deploying state can result from various configuration problems. To check the logs for information on deployment issues encountered, click Logs View Logs on the Workloads widget for the app.
Ready to move on? Continue your TrueNAS Apps journey below.

Learn more about how to find, install, and manage applications in TrueNAS.

Browse the full catalog of applications available in TrueNAS!

Review initial setup, securing apps, contributing apps and resources, and more.

View featured applications, the most deployed, and the newest applications available in TrueNAS.