




Managing Installed Apps
This article covers administering installed applications in TrueNAS. For details on how to set up app storage, configure global settings, and prepare TrueNAS to deploy applications, see Initial Setup. For installing applications from the catalog, see Installing Apps. For custom applications, see Installing Custom Apps.
Installed applications appear on the Installed applications screen. Click on an app row to view Details, including the Application Info, Workloads, Notes, and Application Metadata widgets.
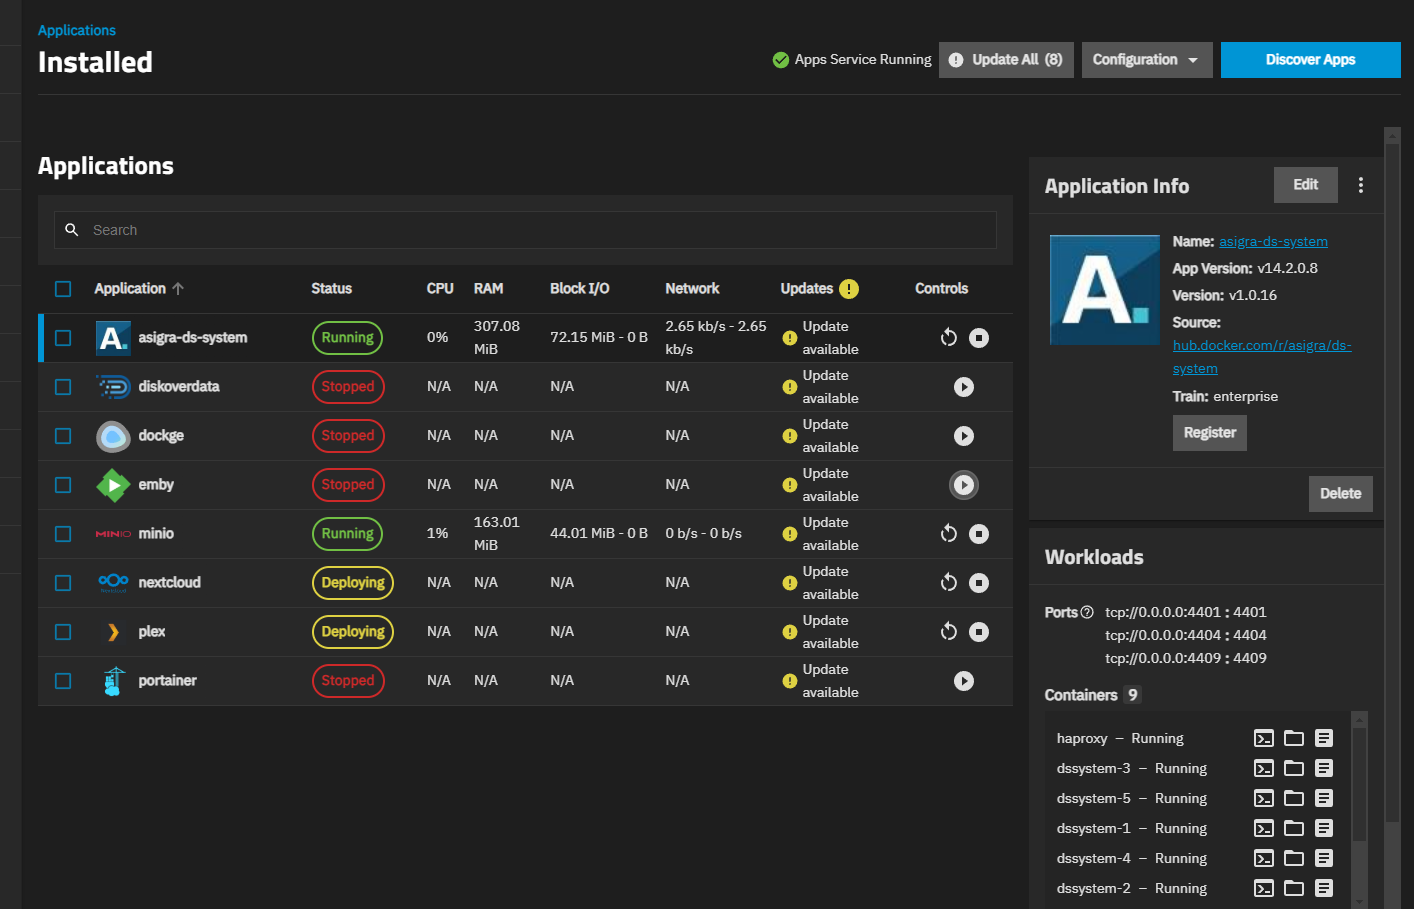
In TrueNAS 26 and later, the Application Info widget shows the app name, Version (upstream application version), Revision (TrueNAS catalog revision), source link, and action buttons. In TrueNAS 25.10 and earlier, the widget shows App Version instead of Version and does not show Revision.
From the Application Info widget, click Edit to edit app configuration settings.
In the Edit screen, users can change all initial configuration settings apart from application name and type of storage volume.
After making all desired configuration changes, click Update and the bottom of the Edit screen to save all modifications. Changes are applied automatically after you have updated the app configuration.
Apps with available updates show a yellow circle with an exclamation point in the Applications table row. In TrueNAS 26 and later, the row displays Update available when the upstream application version is changing, or Revision available when only the TrueNAS catalog revision is changing. The Installed application screen banner displays an Update or an Update All button when updates are detected. To update an app, select the app row and click more_vert on the Application Info widget, then select Update from the dropdown menu. To update multiple apps, either click the Update All button on the Installed applications banner or select the checkbox to the left of the application row to show the Bulk Actions button. Click Bulk Actions and select Update All to update the apps selected. Update options only show if TrueNAS detects an available update for installed applications.
In TrueNAS 26 and later, the bulk update dialog lists each app in an expandable panel showing the app name and current upstream version. Expand a panel to see the version change details — a Version row if the upstream version is changing, and always a Revision row showing the catalog revision change. A Version to be updated to dropdown appears for apps that have multiple available revisions. In TrueNAS 25.10 and earlier, the dialog lists apps with radio buttons and shows a Version dropdown and Changelog when expanded.
In TrueNAS 26 and later, Update opens an update dialog showing the version change. When the upstream application version is changing, the dialog shows a Version row with the current and new upstream versions. The dialog always shows a Revision row with the current and new catalog revision numbers. When multiple catalog revisions are available, a Version to be updated to dropdown appears with options in the format Version: X / Revision: Y. A View Upstream Release Notes link appears when the app provides a changelog URL. In TrueNAS 25.10 and earlier, the update dialog shows Images (to be updated) and Changelog options instead.
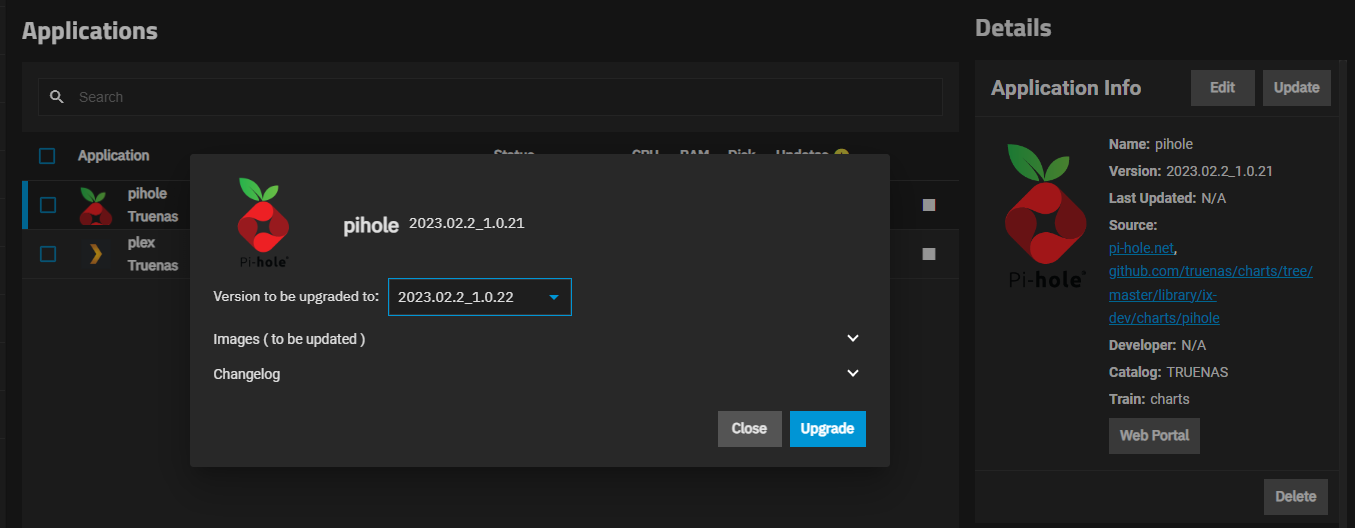
Click Update to begin the process. A counter dialog opens showing the update progress. When complete, the update badge and buttons disappear and the application Update state on the Installed screen changes from Update Available to Up to date.
To roll back an application to a previous version, select the app you wish to roll back from the Installed applications screen. This opens the Application Info widget on the right side of the screen and provides users with the Roll Back button.
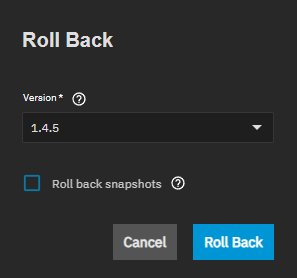
The Version dropdown contains available app versions for roll back. The version numbers displayed are the Revision of the app in the TrueNAS catalog, equivalent to the Revision displayed on the Application Info widget. This is the catalog revision, not the upstream Version. In TrueNAS 25.10 and earlier, this catalog revision is labeled Version on the app information card. See Understanding Versions for more information.
Click Roll back snapshots to restore the application data volume to match the selected version by rolling back to the snapshot for that version. This reverts both the application and app data stored in the apps pool to the exact state from when the snapshot was created.
Roll back snapshots only affects data saved in the apps dataset, such as iXvolume storage. Data in mounted host paths is not rolled back.
Click Roll Back to begin the operation.
If you select a new pool in the Pool dropdown after previously configuring the apps service, the dialog displays the Migrate existing applications option.
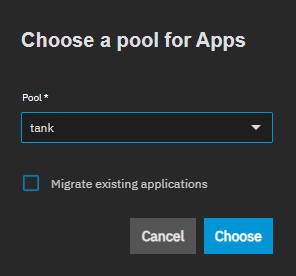
Click Migrate existing applications to migrate all installed applications to the new applications pool.
Migrate existing applications only affects data saved in the apps dataset, such as the app image and iXvolume storage. Data in mounted host paths is not migrated.
To delete an application, click Stop on the application row. After the app status changes to stopped, click Delete on the Application Info widget for the selected application to open the Delete dialog.
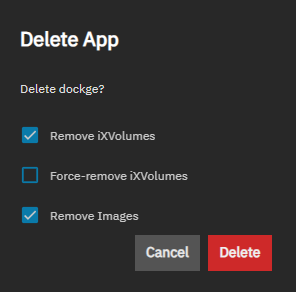
In TrueNAS 26 and later, the dialog displays the application name and prompts you to type the application name in the confirmation field. In TrueNAS 25.10 and earlier, the dialog uses a Confirm checkbox and Continue button instead.
Configure the following options as needed before clicking Delete:
- Remove iXVolumes — deletes hidden app storage from the apps pool. Only shown if the app has iXVolumes.
- Force-remove iXVolumes — deletes app storage created on TrueNAS 24.04 and migrated to 24.10 or later. Only shown when Remove iXVolumes is selected. This action removes both legacy Kubernetes and current Docker data for the application and cannot be undone.
- Remove Images — prunes Docker images of the deleted app.
Type the application name exactly as shown, then click Delete to remove the application.
Apps on the Installed screen, showing either the Deploying or Running status, can be stopped using the stop button on the Applications table row for the app.
Running apps show the restart icon button that allows you to stop and then restart the application. Click the icon button to stop then automatically restart the app.
The Workloads widget shows ports and container information. Each container includes buttons to access a container shell, view volume mounts, and view logs.
Click Shell and enter an option in the Choose Shell Details window to access a container shell.
Click folder_open to view configured storage mounts for the container.
Click Logs to open the Container Logs window. Select options in Logs Details and click Connect to view logs for the container.
While on the Installed application screen, click Configuration > Manage Container Images to open the Manage Container Images screen.
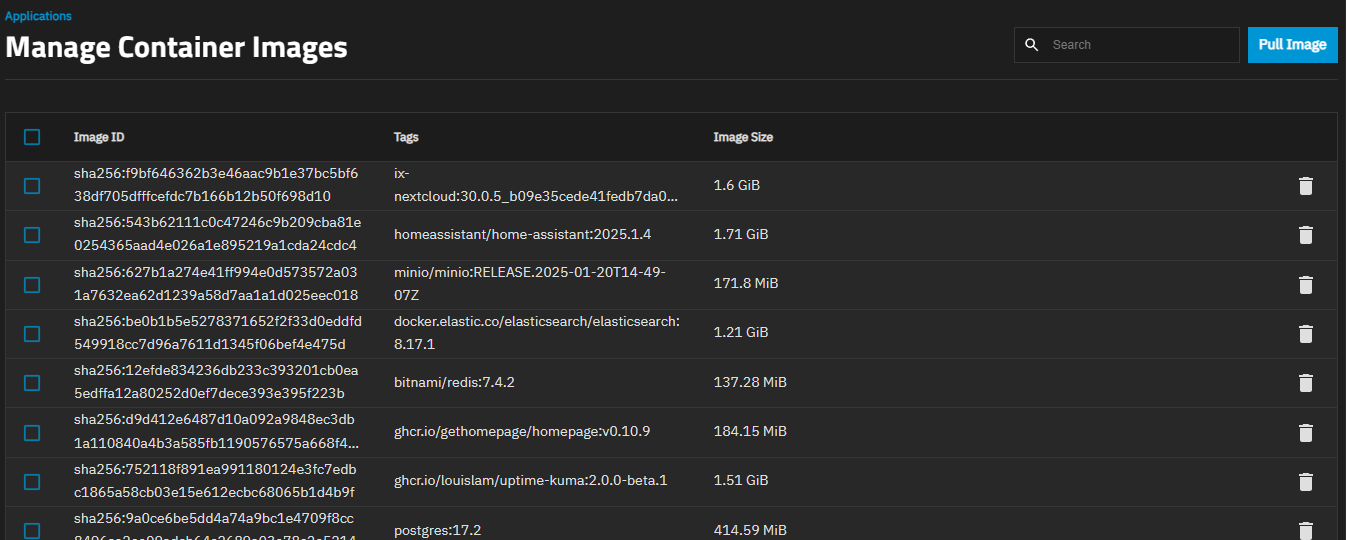
Delete images or add new ones from this screen.
To download a custom image, click Pull Image, then enter a valid path and tag to the image.
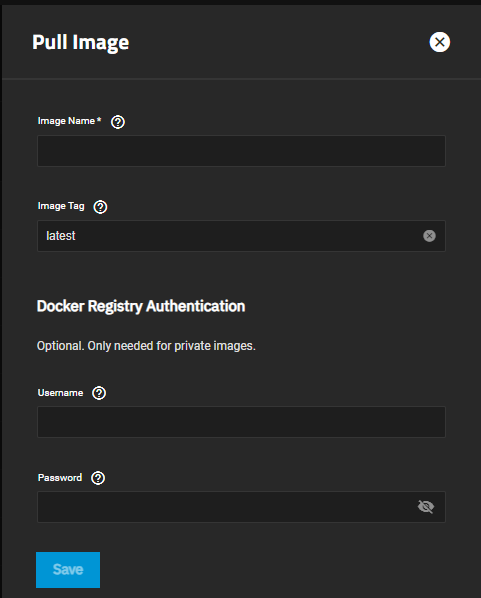
Enter the path using the format registry/repository/image to identify the specific image. The default latest tag downloads the most recent image version.
When downloading a private image, enter user account credentials that allow access to the private registry.
To delete images, click Delete Delete in an image row or the Batch Operations section. The Delete dialog lists the selected image(s) for deletion.
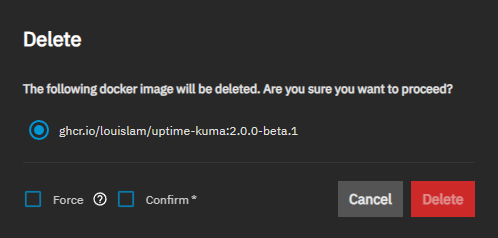
An image cannot be deleted if it is associated with a running container. Select Confirm, then click Delete.
Force allows deletion when an image has multiple tags or when a stopped container prevents its removal. Use Force with caution, as it can break dependencies or leave images without defined tags.
Installed custom applications show on the Installed applications screen. Many of the management options available for catalog applications are also available for custom apps.
TrueNAS monitors upstream images and alerts when an updated version is available. Update custom applications using the same procedure as catalog applications.
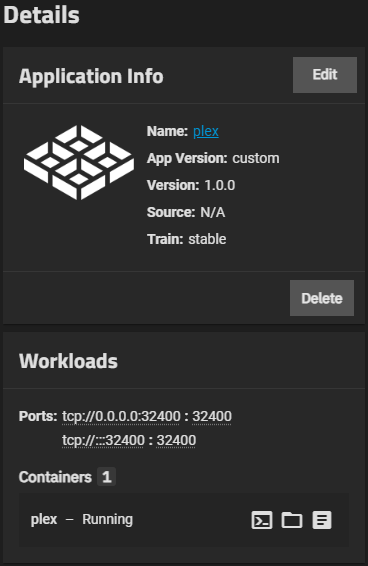
Custom applications installed via YAML do not include the Web UI button on the Application Info widget. To access the web UI for a custom app, navigate to the port on the TrueNAS system, for example, hostname.domain:8080.
To convert an installed catalog application to a custom YAML application, select the app row and click more_vert on the Application Info widget, then select Convert to custom app from the dropdown menu. Converting to a custom app direct editing to YAML configuration file.
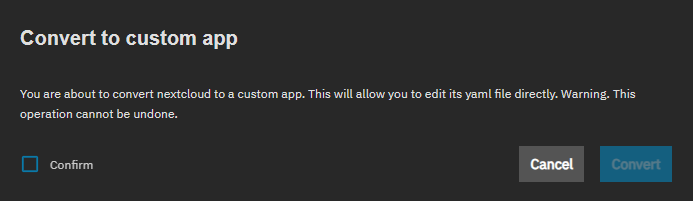
Convert to custom app is a one-time, permanent operation. Once converted, an custom application cannot be converted back to a catalog version.
Select Confirm then click Convert to begin the conversion process.
Ready to move on? Continue your TrueNAS Apps journey below.

Learn more about how to find, install, and manage applications in TrueNAS.

Browse the full catalog of applications available in TrueNAS!

Review initial setup, securing apps, contributing apps and resources, and more.

View featured applications, the most deployed, and the newest applications available in TrueNAS.
MinIO is a trademark of the MinIO Corporation.