Nextcloud Deployment
Support and documentation for applications within the Stable catalog is handled by the TrueNAS community. The TrueNAS Applications Portal hosts but does not validate or maintain any linked resources associated with this app.
We welcome community contributions to keep this documentation current! Click Edit Page in the top right corner to propose changes to this article.
Nextcloud is a drop-in replacement for many popular cloud services, including file sharing, calendar, groupware, and more. One of its more common uses for the home environment is serving as a media backup, and organizing and sharing service.
Nextcloud 24 introduced support for handing off image preview thumbnail generation to an external service, Imaginary, a small HTTP server written in GO. It receives images over a REST API. Imaginary can upscale, downscale, crop, or resize images. TrueNAS Nextcloud app users can include Imaginary in their app deployment.
Refer to the Nextcloud app information screen for details on the version and release.
This procedure demonstrates how to set up the TrueNAS Nextcloud app and configure it to support hosting various media file previews, including High-Efficiency Image Container (HEIC), MP4, and MOV files.
TrueNAS Nextcloud app postgres options include a postgres image selector and data storage volume. TrueNAS Nextcloud app provides backward compatibility and migration of early Nextcloud deployments.
TrueNAS offers one deployment option for setting up Nextcloud, a Linux Debian-based TrueNAS version application available in TrueNAS releases 24.10 and later. The instructions in this article apply to these TrueNAS 24.10 and later releases.
TrueNAS offered a FreeBSD-based TrueNAS Nextcloud plugin in releases 13.0 and 13, but it is no longer available in TrueNAS 13.0 and is becoming unavailable in 13.3. Refer to release notes for more information on upcoming and current changes. For more information on the TrueNAS FreeBSD-based Nextcloud plugin, see Nextcloud.
Before you install the Nextcloud app:
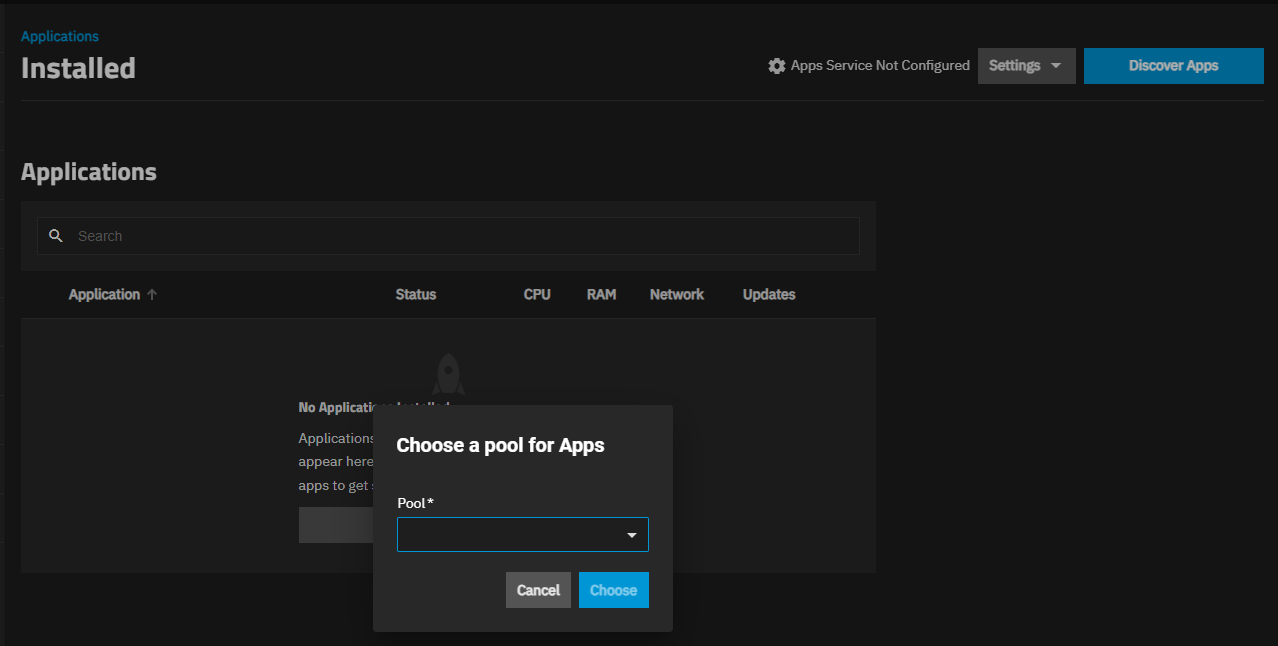
Set a pool for applications to use if not already assigned.
You can use either an existing storage pool or create a new one. TrueNAS creates the ix-apps (hidden) dataset in the pool set as the application pool. This dataset is internally managed, so you cannot use this as the parent when you create required application datasets.
After setting the pool, the Installed Applications screen displays Apps Service Running on the top screen banner.
Locate the run-as user for the app.
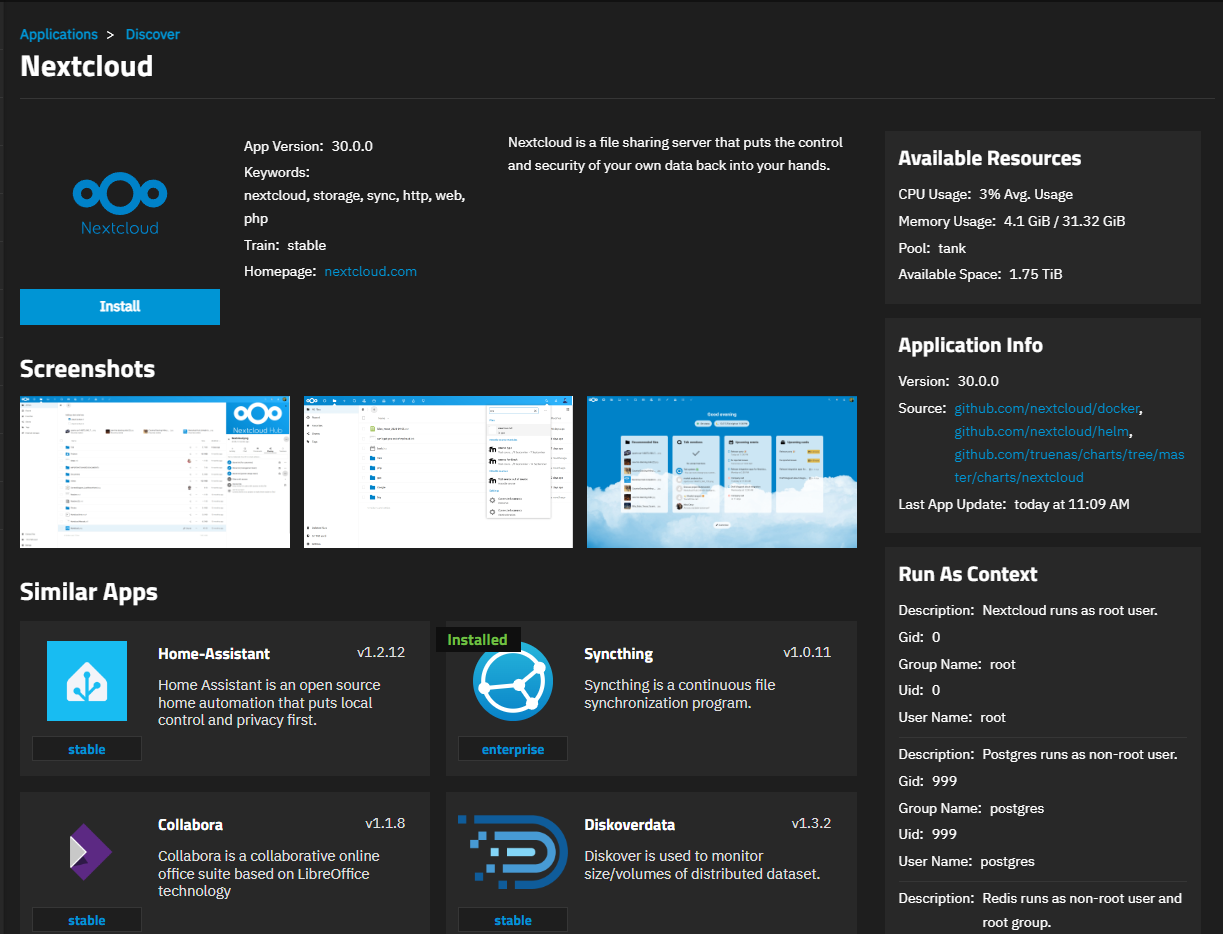
Take note of the run-as user for the app, shown on the app information screen in the Run As Context widget and in the Application Metadata widget on the Installed applications screen after the app fully deploys. The run-as user(s) get added to the ACL permissions for each dataset used as a host path storage volume.
(Optional) Create a new TrueNAS user account to manage this application. When creating a new user account to manage this application or using an existing TrueNAS administrator account, enable sudo permissions for that TrueNAS user account, select Create New Primary Group, and add the appropriate group in the Auxiliary Group for the type of user you want to create. Make note of the UID for the new user to add in the installation wizard.
Add the user ID to the dataset ACL permissions when setting up app storage volumes in the Install app wizard.
(Optional) Create datasets for the storage volumes for the app.
Do not create encrypted datasets for apps if they are not required! Using an encrypted dataset can result in undesired behaviors after upgrading TrueNAS when pools and datasets are locked. When datasets for the containers are locked, the container does not mount, and the apps do not start. To resolve issues, unlock the dataset(s) by entering the passphrase/key to allow datasets to mount and apps to start.You can create the required datasets before or after launching the installation wizard. The install wizard includes the Create Dataset option for host path storage volumes. This allows you to create the parent dataset if you want to organize the required datasets under a parent, or you can create all datasets before you begin installing the app.
To create datasets before using the Install Frigate wizard, go to Datasets and select the pool or parent dataset where you want to place the dataset(s) for the app. For example, /tank/apps/appName.
To change the permissions for the data and html datasets:
- Select the dataset (data or html), scroll down to the Permissions widget and click Edit to open the Edit ACL screen for the selected dataset.
- Change root to apps in the Owner and Owner Group fields, then click Apply Owner and Apply Group.
- Click Save Access Control List.
- Select the data dataset and repeat steps 1-3 above.
Both datasets are now configured with apps as the owner.
When storage volumes include a postgres dataset, do not select Enable ACL to configure permissions. Instead, proceed with entering or browsing to select the dataset to populate the Host Path field, and then select the Automatic Permissions option. This configures permissions for the postgres dataset and, if configured, the parent dataset used to organize required datasets for the app.
As with other host path storage volumes, you can create a dataset when entering the host path.
You can use Enable ACL to manually configure ACL permissions for the postgres dataset and a parent dataset, but getting the ACL permissions right is involved and if not correctly configured, you are likely to receive errors after clicking Install on the application installation wizard. Additionally, the Automatic Permissions option does not show on the wizard screen.
Finish the permission configuration in the app installation wizard as described in the installation procedure below.
Import or create a self-signed certificate for the app. Adding a certificate is optional, but if you want to use a certificate for this application, options vary based on the TrueNAS release:
- Systems with TrueNAS 25.10 or later can import a certificate into TrueNAS for the app to use.
- Systems with the latest maintenance release of 25.04.x or earlier can create a new self-signed CA and add a certificate based on the CA, or import an existing CA and create the certificate for the app to use. A certificate is not required to deploy the application.
- Set up a Nextcloud account.
If you have an existing Nextcloud account, enter the credentials for that user in the installation wizard. If you do not have an existing Nextcloud account, you can create one in the Nextcloud Configuration section of the application install wizard.
This basic procedure covers the required Nextcloud app settings. For optional settings, see Understanding App Installation Wizard Settings.
You can have multiple deployments of the same app (for example, two or more from the stable or enterprise trains, or a combination of the stable and enterprise trains).
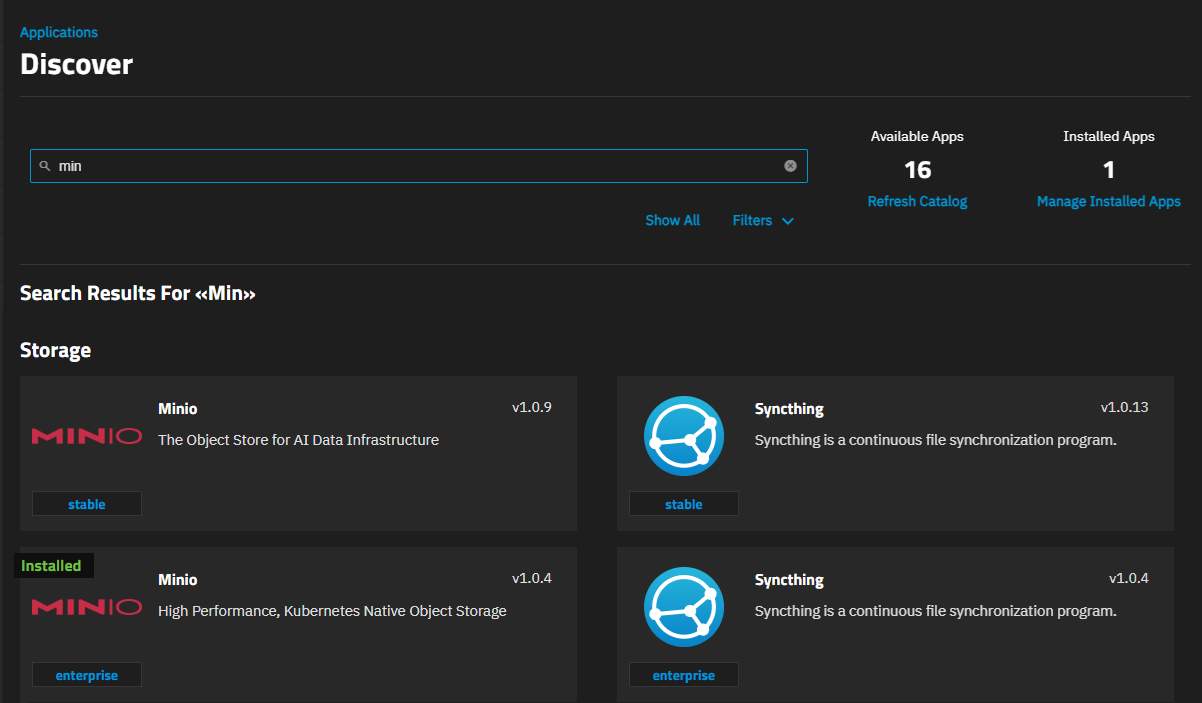
Go to Apps, click on Discover Apps, and locate the app widget by either scrolling down to it or begin typing the name into the search field. For example, to locate the MinIO app widget, begin typing minIO into the search field to show app widgets matching the search input.
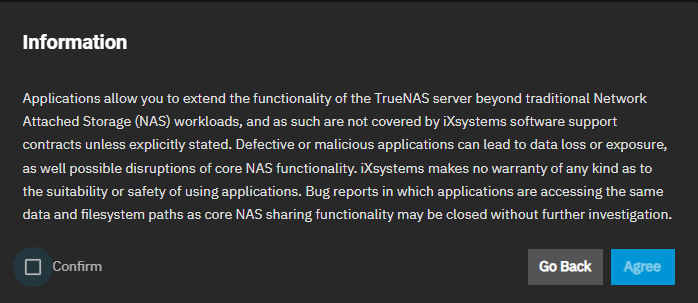
If this is the first application installed, TrueNAS displays a dialog about configuring apps.
If not the first time installing apps the dialog does not show, click on the widget to open the app information screen.
Click Install to open the app installation wizard.
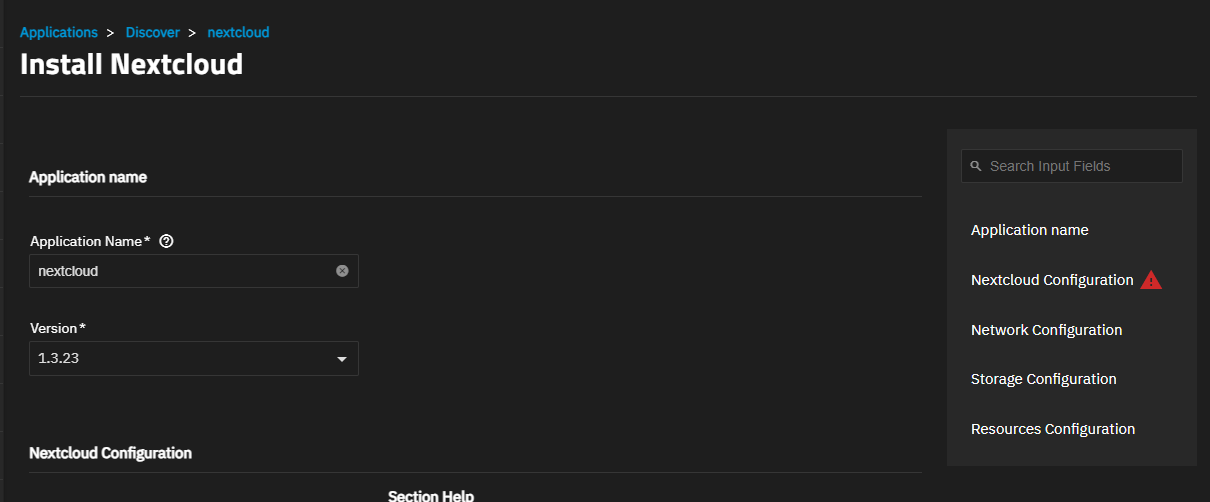
Application configuration settings are grouped into several sections, each explained below in Understanding App Installation Wizard Settings. To find specific fields begin typing in the Search Input Fields search field to show the section or field, scroll down to a particular section, or click on the section heading in the list of sections on the upper-right of the wizard screen.
Accept the default value or enter a name in Application Name field. In most cases use the default name, but if adding a second deployment of the application you must change this name.
Accept the default version number in Version. When a new version becomes available, the application shows an update badge and the Application Info widget on the Installed applications screen shows the Update button.
Next, enter the Nextcloud Configuration settings. You can accept the defaults for many of the Nextcloud configuration settings except those mentioned in the expandable section below.
Enter the network configuration settings. Accept the default port, 30125, in WebUI Port, or enter an available port number of your choice. See Network Configuration below for more information on changing the default port. This port must match the one used in Host above.
If you want to bind IPs on the host to the port number in 30125, click Add to the right of Host IPs and enter the IP(s).
If you configured a certificate for Nextcloud, select it in Certificate ID. A certificate is not required unless you want to use an external port other than the default 30125.
Add your Storage Configuration settings.
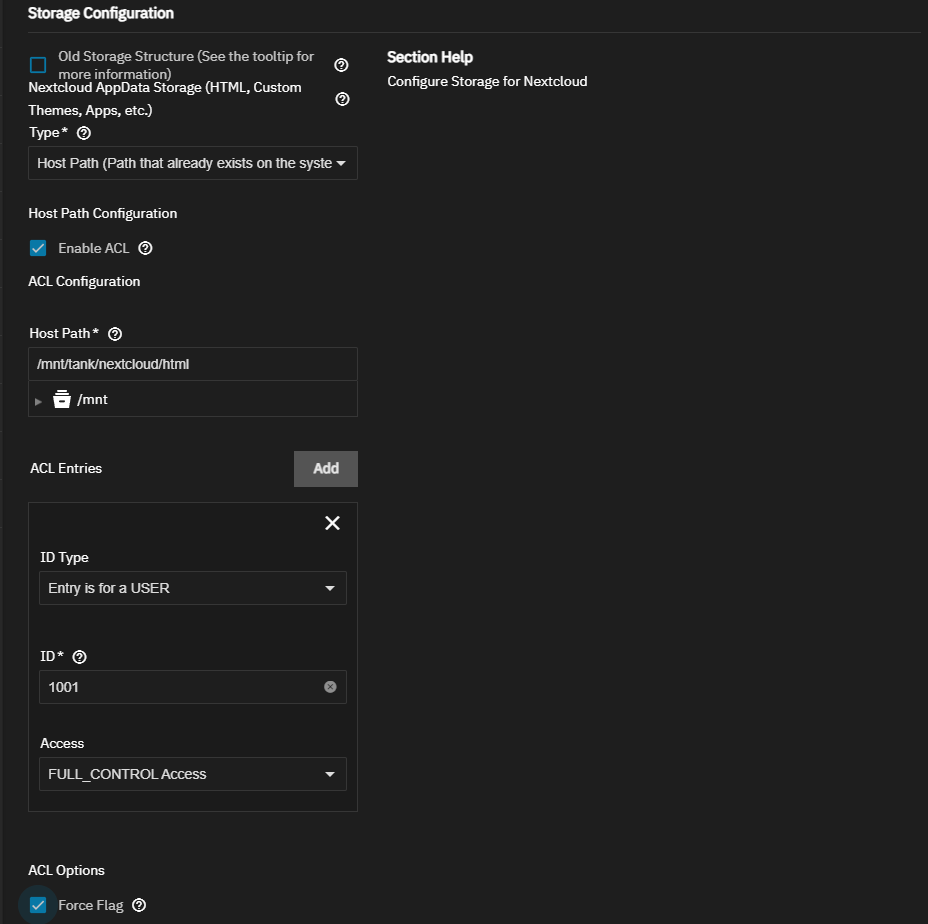
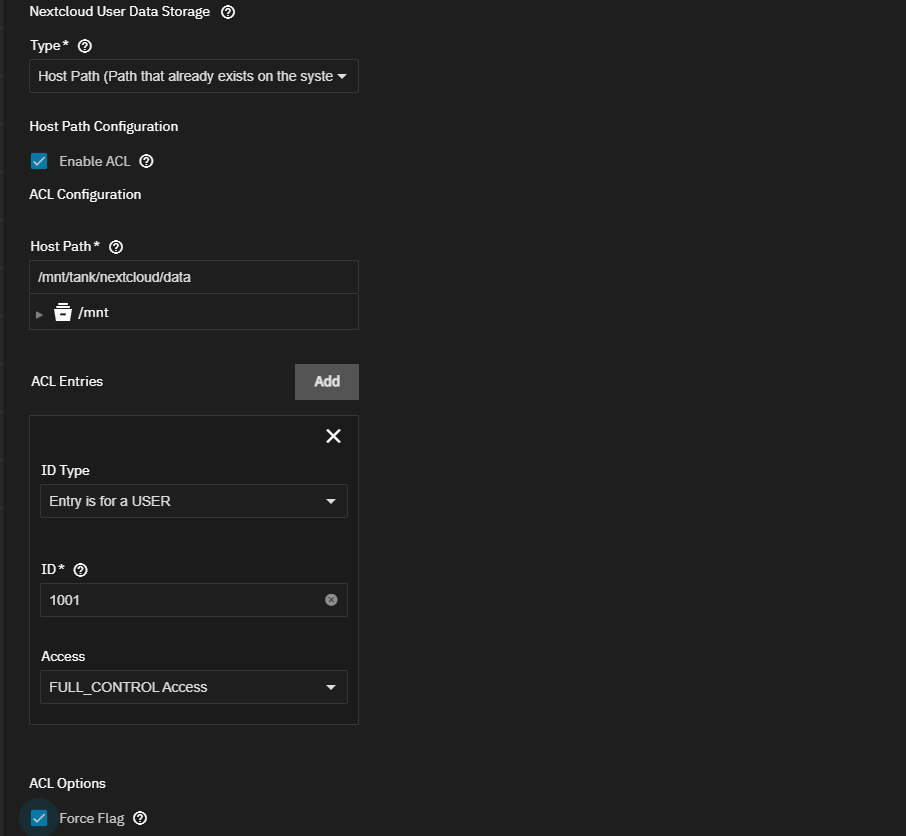
Set Type to Host Path (Path that already exists on the system) for AppData Storage. Select Enable ACL, then enter or browse to select the html dataset to populate the Host Path field.
Select Force Flag to allow upgrading the app when the dataset has existing data.
Repeat the storage steps above to configure the host path for Nextcloud Data Storage. Enter or select the data dataset.
Click ACE Entries, and add an entry for 568 with FULL_CONTROL permission.
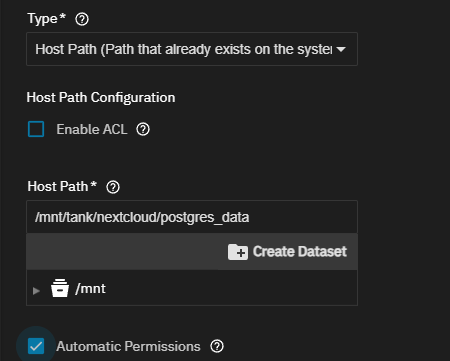
To configure the Nextcloud Postgres Data Storage host path, do not select Enable ACL!
Set Type to Host Path (Path that already exists on the system), then enter or browse to select the postgres_data dataset to populate the Host Path field.
Select Automatic Permissions. This does not show if you selected Enable ACL.
See Storage Configuration Settings below for more information.
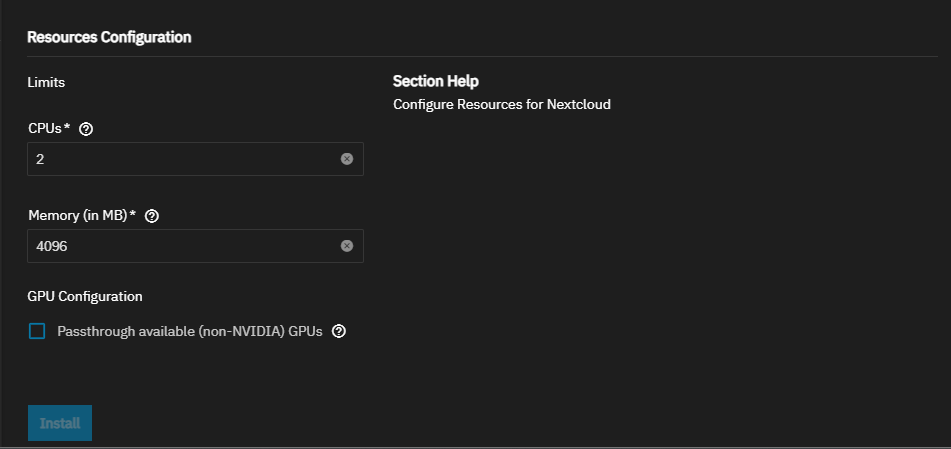
Accept the defaults in Resources Configuration, and select the GPU option if applicable.
Click Install. A progress dialog displays before switching to the Installed applications screen. The Installed screen displays with the nextcloud app in the Deploying state. Status changes to Running when ready to use.
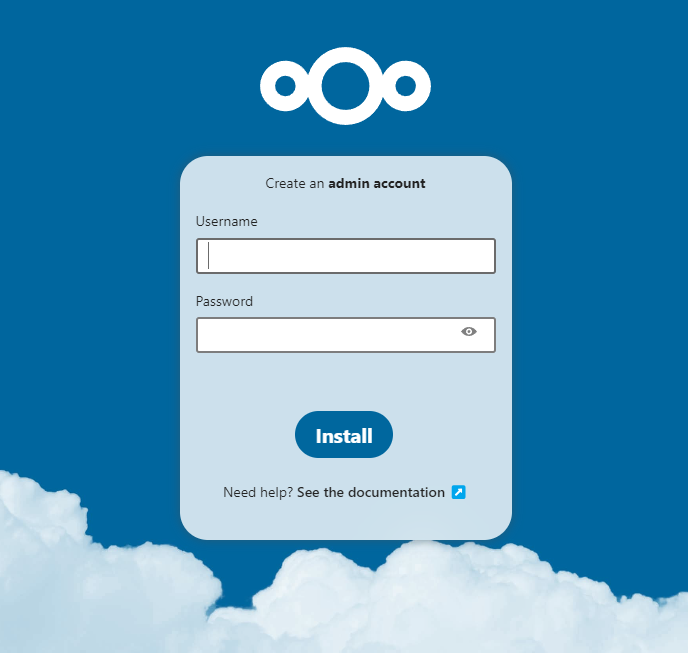
Click Web UI on the Application Info widget to open the Nextcloud web portal sign-in screen.
The following sections provide more detailed explanations of the settings in each section of the Install Nextcloud installation wizard.
Accept the default value or enter a name in Application Name field. In most cases use the default name, but if adding a second deployment of the application you must change this name.
Accept the default version number in Version. When a new version becomes available, the application shows an update badge and the Application Info widget on the Installed applications screen shows the Update button.
Nextcloud configuration settings include setting up credentials, server information like timezone, maintenance window start, and default phone region, performance settings, how previews display (sizing and quality settings), providers, expiration settings, trusted domains and proxies, enabling/disabling related services like Collabora, the host IP and port, adding a cron job with schedule, and adding additional environment variables.
Nextcloud deploys the ffmpeg and smbclient packages for you so these no longer show in the configuration.
Select the timezone where your TrueNAS system is located. Begin typing the location into the Timezone field to filter the list until the location shows, then select it.
If you have an existing Nextcloud account with Redis and Nextcloud databases, enter the existing administration user credentials in the Admin User and Admin Password fields. Enter the existing Redis password in Redis Password. Enter the Nextcloud database password in Database Password.
If you do not have an existing account, enter the name and password you want to use to create the Nextcloud login credentials. Enter a password in Redis Password and Database Password to set up these areas.
Nextcloud Redis requires a password for access. If you have an existing Nextcloud account with Redis configured, enter that existing password here but if not, enter a password to use for Redis in Nextcloud. Nextcloud also requires a password to secure access to the database. If you have an existing Nextcloud account database with a password configured, enter it Database Password. Enter a new password if you do not have an existing database password. The default value is nextcloud. The TrueNAS Nextcloud app passes these passwords to Nextcloud.
(Optional) To use language codes, click Add to the right of Tesseract Language Code to show the Language field. Enter the options you want, chi-sim for Simplified Chinese or eng for English.
For more information on tesseract languages to install for OCRmypdf, see here for a list of language codes. Entering the wrong language code prevents the container from starting.
Select Run Optimized to enable Nextcloud optimizations. For more information, visit https://github.com/truenas/containers/blob/master/apps/nextcloud-fpm/configure-scripts/occ-optimize.sh.
Max Chunksize (MB) sets the maximum chunk size for user-chunked uploads. The default setting is 10 MB.
PHP Upload Limit (GB) Sets the PHP upload limit. It applies a timeout to the client_max_body size in nginx, and the post_max_size and upload_max_filesize in PHP. The default value is 3.
PHP Memory Limit (MB) sets the maximum amount of memory a script can consume. The default is 512 MB, with the setting range of 128 to 4096.
Maintenance Window Start sets the start of the maintenance window. The default value is 100, which disables this feature. Nextcloud runs some background jobs once a day. When an hour is defined, background jobs advertise themselves as non-time-sensitive are delayed during the working hours and only run in the four hours after the specified time. A value of 1 runs background jobs between 1:00 a.m. UTC and 5:00 a.m. Refer to https://docs.nextcloud.com/server/28/admin_manual/configuration_server/background_jobs_configuration.html#maintenance-window-start for more information.
Default Phone Region sets the default region for phone numbers for your Nextcloud app (server), using ISO 3166-1 country codes such as DE for Germany, FR for France, etc. It is required to allow users to insert phone numbers in the user profiles starting without the country code (e.g. +49 for Germany). The default value for TrueNAS systems in the United States is US.
Nextcloud supports previews of image files. Preview setting options control enabling and disabling previews, and thumbnail size. By default, Nextcloud can generate previews for:
- Image files
- Covers of MP3 files
- Text documents
Preview settings have two main settings:
- Enabled - Enables the preview settings listed below. When disabled, it does not show previews.
- Imaginary - Enables using Imaginary to configure thumbnail settings. Enabling triggers actions (updating configuration, adding the Nextcloud app) on each startup to ensure the configuration is present. Disabling this setting modifies triggered actions (removing the Nextcloud app) upon startup. Configuration is absent when disabled.
For more information on preview settings, refer to Nextcould documentation and Nextcloud server configuration.
| Setting | Default Value | Description |
|---|---|---|
| Max X | 2048 | Sets the maximum width, in pixels, of the preview. A value of null means no limit. Nextcloud sets the default to 4096. |
| Max Y | 2048 | Sets the maximum height, in pixels, of the preview. Null means no limit. Nextcloud sets the default to 4096. |
| Max Memory (MB) | 1024 | Sets the maximum memory available to users to generate an image preview with imaged. It reads the image dimensions from the header and assumes 32 bits per pixel. If creating the image allocates more memory, preview generation is disabled and the default mimetype icon shows. Set to -1 for no limit. Nextcloud default is 256 MB. |
| Max Filesize Image (MB) | 50 | Sets the maximum file size for generating image previews with imaged (default behavior). If the image exceeds the maximum size, it tries other preview generators but most likely shows the default mimetype icon or does not display the image. When set to -1 it sets no limit and tries to generate image previews on all file sizes. The default value is 50. |
| JPEG Quality | 60 | Sets the JPEG quality for preview images. The default value is 60. |
The Square Sizes, Width Sizes, and Height Sizes settings show Size fields added by the app based on what the preview generation sends to the app. Default sizes are based on what others used to have balanced size vs quality vs speed.
The Providers section shows 10 Provider fields with dropdown lists of all available provider options. Modify or accept the default providers to suit your use case. Nextcloud providers enable registered providers. Other providers are disabled by default due to performance or privacy concerns.
Add shows another Provider field to select another provider.
Activity Expire Days sets the number of days to keep activity logs. The default setting is 365.
Trash Retention sets the time deleted content is retained. The default value is auto. Defines the policy for when files and folders in the trash bin are permanently deleted. When the user quota limit is exceeded due to deleted files in the trash bin, retention settings are ignored and files are cleaned up until the quota requirements are met. The app allows for two settings, a minimum and maximum time for retention. The minimum time is the number of days files are kept before they are deleted. The maximum time is the number days to keep files after which they are guaranteed to be deleted. The default is auto. Possible Values:
- auto - Keeps files and folders for 30 days, then automatically deletes anytime after that if space is needed.
- D, auto - Keeps files and folder in the trashbin for D + days, then are deleted anytime after that if space is needed.
- auto, d - Deletes all files in the trashbin that are older than D days automatically, then deletes files anytime if space is needed.
- D1, D2 - Keeps files and folders in the trash bin for at least D1 days and delete when exceeds D2 days (not automatically deleted if space is needed)
- disabled - Trashbin auto deletes is disabled. Files and folders are kept forever.
See https://docs.nextcloud.com/server/latest/admin_manual/configuration_files/trashbin_configuration.html#deleted-items-trash-bin for more information.
Versions Retention sets the time versions are retained. See https://docs.nextcloud.com/server/latest/admin_manual/configuration_files/file_versioning.html for more information. Version retention defines the policy for when versions are permanently deleted. Allows for two settings, a minimum and a maximum time for version retention. The minimum time is the number of days a version is kept before it can be deleted. The maximum time is the number of days after which it is guaranteed to be deleted. Minimum and maximum times can be set together to define version deletion. This setting is initially set to auto. Available values:
- auto - Automatically expire versions according to expire-rules. Refer to Nextcloud Controlling file versions and aging for more information.
- D, auto - Keeps versions at least for D days, applies expiration rules to all versions older than D days.
- auto, D - Deletes all versions older than D days then automatically deletes other versions according to expire-rules.
- D1, D2 - Keeps versions for at least D1 days and deletes when it exceeds D2 days
- disabled - Versions auto-clean when disabled. Versions are kept forever.
Add, to the right of Tasks, shows the Schedule and Command setting options. Enter the time and day settings in Schedule and the command to run in Command. If enabled, Cron shows the Schedule option. The default value is */5 * * * *. Enter the schedule values to replace the asterisks based on your desired schedule.
Notify Push Enables or disables start-up trigger actions like updating the configuration, adding/removing the Nextcloud app, etc., to ensure the configuration is present or absent. Select Enable to enable notification push.
Collabora enables or disables the Collabora settings for Nextcloud. Enables/disables start-up trigger actions like updating the configuration, adding/removing the Nextcloud app, etc., to ensure the configuration is present or absent. Select Enable to enable Collabora.
Onlyoffice enables or disables the Onlyoffice settings for Nextcloud. It enables/disables start-up trigger actions like updating the configuration, adding/removing the Nextcloud app, etc., to ensure the configuration is present or absent. Select Enable to enable Onlyoffice.
Clamav enables Clamav settings for Nextcloud. Select Enable to enable Clamav.
Sets the protocol, host, and external port for Nextcloud.
Protocol Sets the protocol used to access Nextcloud. Options are HTTP or HTTPS. When using a reverse proxy, set use HTTPS. When setting up a certificate in the Network Configuration, HTTPS is set automatically.
Host Set to the host name or IP address of the TrueNAS system with the Nextcloud app. Do not include the protocol or the port. For example, cloud.domain.com or 192.168.1.100.
External Port Set to the external port used to access Nextcloud.
If using a reverse proxy, you most likely want to use 443; leave it set to 0 if not using anything else in front of Nextcloud. For example, 443.
Trusted Domains sets additional trusted domains for Nextcloud. The Host setting and the hosts of Collabora and/or Onlyoffice are automatically added.
Per Nextcloud, this is a list of trusted domains users can LoT into. Specifying trusted domains prevents host-header poisoning. This performs necessary security checks.
Specifying an exact hostname with a permitted port (e.g., demo.example.org:111) disallows other ports on this host.
The asterisk wildcard allows host matching. For example, ubos-raspberry-pi* allows ubos-raspbery-pi.local and ubos-raspbery-p-2i.local.
Enter an IP address with or without a permitted port (e.g. [2001:db8::1]:8080). Using TLS certificates where commonName=
Add shows the Domain field where you enter the domains to add as trusted domains.
Trusted Proxies sets proxies (proxy servers) Nextcloud is to trust. Setting an array that is a combination of IPv4 or IPv6 addresses with or without CIDR notations is possible. Connections from trusted proxies are specially treated to get the real client information Nextcloud uses in access control and log in. Trusted proxies provide protection against client spoofing. When an incoming request remote address matches a specified IP address, it is assumed to be a proxy instead of a client. Client IPs are read from the HTTP header specified in forwarded headers. Defaults to an empty array.
Add a Proxy setting field in addition to the three default proxy fields specifying 10.0.0.0/8, 172.16.0.0/12, and 192.168.0.0/16. 10.0.0.0/8 tells Nextcloud to trust any IP in the 10.0.0.0/8 range. IPs in this range are used in large enterprises or Docker. Trusting the entire range is a permissive configuration that assumes all devices in this range are secure and correctly configured proxies. Narrow the range unless you explicitly need the full range. 172.16.0.0/12 tells Nextcloud to trust any IP in this range. Because the default bridge network for Docker often uses subnets within the 172.16.0.0/12 to 172.117.0.0/16 range, specifying this IP ensures compatibiltiy across Docker networks. Narrow this range to reduce the number of IP addresses to a more limited range of trusted proxies. 192.168.0.0/16 Tells Nextcloud to trust any IP in this range. It covers IP addresses typically used in home and small office networks. Narrow the range for a more limited range of trusted proxies.
The app wizard is configured with all settings required to deploy the container, but you can add additional settings if you want to further customize the app in TrueNAS.
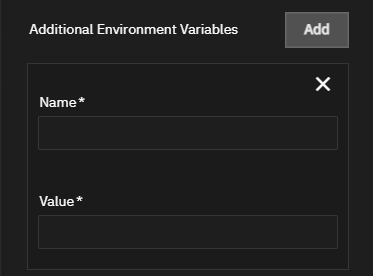
Click Add to the right of Environmental Variables to show a set of fields to configure the application with additional variables.
You can add environment variables to the app configuration after deploying it. Click Edit on the Application Info widget for the app found on the Installed Application screen to open the edit screen.
Refer to Nextcloud documentation for more information on environment variables.
Some TrueNAS apps have predefined run-as user and group IDs. These assignments vary based on the app train and other variables such as installing but not running as the root user.
Default user and group IDs are:
- 473 for the MinIO stable train app.
- 568 (apps user), used in some community apps and all apps in the enterprise train
- 999 (netdata user), used for all postgres storage volumes
- 0 (root user).
Accept the default user and group ID in the User and Group Configuration section or enter the user ID for a new TrueNAS user created to serve as the administrator for this app.
Create any app administrator user before installing the application, and take note of the UID. Enter this user ID when configuring the user for the app and as the user when setting up storage volume permissions.
The WebUI Port settings include:
Port Bind Mode options:
- Publish port on the host for external access - the port is published on the host for external access.
- Expose port on the host for external access - The port is exposed for inter-container communication.
- None - The port is not exposed or published.
If the Dockerfile defines an EXPOSE directive, the port can still be exposed for inter-container communication regardless of this setting.
Port Number The default web port for Nextcloud is 30125.
All TrueNAS apps are assigned default port numbers. Accept the default port numbers, but if changing port number assignments, enter a number within the range 1-65535, however, 0-1024 might require the application to have elevated privileges. Before changing default ports, refer to the TrueNAS default port list for a list of assigned and available port numbers.
The app does not require configuring advanced DNS options. Accept the default settings or click Add to the right of DNS Options to enter the option name and value.
When using a certificate, the best practice is to import an existing certificate if your system is on release 25.10 or later.
Systems with the latest maintenance TrueNAS 25.04.x or earlier releases can create a self-signed certificate before using the app installation wizard.
If you did not create a certificate before starting the installation wizard, select the default TrueNAS certificate, and then edit the app to change the certificate after deploying the application.
Select the certificate created in TrueNAS for the app from the Certificate dropdown list.
TrueNAS provides two options for storage volumes: ixVolumes and host paths.
Nextcloud needs three datasets for host path storage volume configurations:
- html for the AppData storage volume.
- data for the User Data storage volume.
- postgres_data for the Postgres Data storage volume.
If you nest these datasets under a parent dataset named nextcloud, you can create this nextcloud dataset with the Dataset Preset set to Generic or Apps.
Configure both the data and html dataset ACL permissions as described in the Before You Begin section. Change the owner and owner group to the Apps user on the Edit ACL screen before you configure permissions in the installation wizard storage section. Failure to do this results in the app not deploying with tracebacks. Detangling permission issues to get the app to deploy might require deleting the datasets and starting over.
When the app has postgres storage volumes, the process is easier and less prone to permission errors when using the Automatic Permissions option in the postgres storage volume section of the install Wizard.
When storage volumes include a postgres dataset, do not select Enable ACL to configure permissions. Instead, proceed with entering or browsing to select the dataset to populate the Host Path field, and then select the Automatic Permissions option. This configures permissions for the postgres dataset and, if configured, the parent dataset used to organize required datasets for the app.
As with other host path storage volumes, you can create a dataset when entering the host path.
You can use Enable ACL to manually configure ACL permissions for the postgres dataset and a parent dataset, but getting the ACL permissions right is involved and if not correctly configured, you are likely to receive errors after clicking Install on the application installation wizard. Additionally, the Automatic Permissions option does not show on the wizard screen.
You can configure ACL permissions for the required dataset in the Install Nextcloud wizard, or from the Datasets screen any time after adding the datasets.
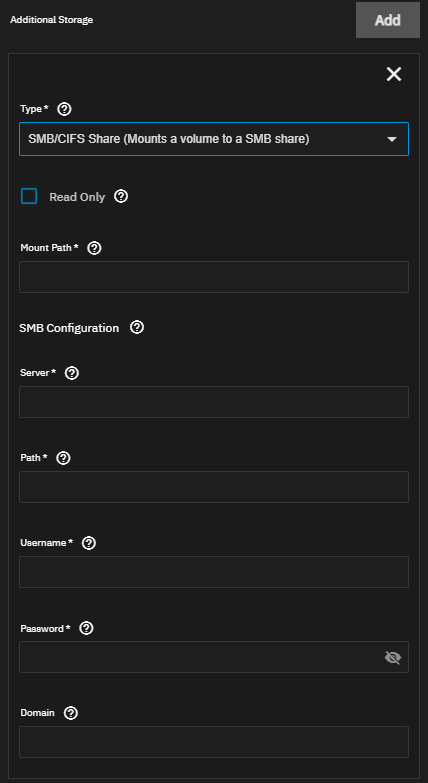
TrueNAS Additional Storage options include mounting an SMB share inside the container pod.
If adding an SMB share as an additional storage volume, create the SMB dataset and share user(s), and add the user ID for the share user(s) to the dataset ACL.
Set Type an SMB/CIFS Share (Mounts a volume to a SMB share) to add an SMB share storage volume.
Select Read Only to make the storage volume read only.
Enter the path inside the container to mount the storage for the share volume in Mount Path.
Enter the server address for the SMB share in Server, the path to mount the SMB share in Path, and the share authentication user credentials in User and Password. (Optional) enter the share domain name in domain.
Permissions are currently limited to the permissions of the user that mounted the share.
Use the SMB option for data synchronization between a share and the app if the option shows on the screen. A present, only the Syncthing app includes this option.
The Labels Configuration settings allow users to configure Docker object labels to add metadata to containers. Docker object labels attach key-value metadata to various Docker objects, such as containers, images, volumes, and networks. Labels are useful for organization, automation, and providing additional context for Docker resources. They can store information such as environment details, ownership, service role, or custom tags for automation tools.
Click Add to display a set of label configuration fields.
Use Key to define the identifier that categorizes and filters resources, for example com.example.owner. Use Value to enter the associated data for the container, for example team-a.
Select the target container from the Containers dropdown list to apply the label(s). Apps with multiple containers list each container as an option on the dropdown.
Click Add again to configure additional labels.
Tips for Labels:
- Docker recommends using reverse-DNS notation to prevent conflicts with other objects.
- Use a consistent naming convention for labels applied across all containers, for example, com.example.owner=team-a, com.example.owner=team-b, com.example.env=production, com.example.env=testing.
- Use in groupings, for example, when applying configuration changes where labels define or group related database resources (com.example.role=db).
- Use reverse-DNS notation to prevent conflicts with other objects, as recommended by Docker.
- Use a consistent naming convention for labels applied across all containers, for example, com.example.owner=team-a, com.example.owner=team-b, com.example.env=production, com.example.env=testing.
- Use in groupings, for example, when applying configuration changes where labels define or group related database resources (com.example.role=db).
- Combine labels for more granular control, for example, using com.example.env=prod and com.example.tier=frontend to distinguish frontend from backend services in production environments.
Accept the default values in Resources Configuration or enter new CPU and memory values. By default, this application is limited to use no more than 2 CPU cores and 4096 megabytes available memory. The application might use considerably less system resources.
To customize the CPU and memory allocated to the container the app uses, enter new CPU values as a plain integer value (letter suffix is not required). The default is 4096.
Accept the default value (4 Gb) allocated memory or enter a new limit in bytes. Enter a plain integer without the measurement suffix, for example, 129 not 129M or 123MiB.
GPU Configuration provides the option to enable GPU passthrough. Select Passthrough available (non-NVIDIA) GPUs or, if your system has an NVIDIA GPU device, select Use this GPU.
For more information on GPU passthrough, see TrueNAS Apps.
Users can use Collabora and Nextcloud together. Collabora allows users to open and edit documents stored in their Nextcloud account. This integration allows users to edit a document simultaneously while providing live comments, suggestions, and version histories.
Users with Collabora and Nextcloud applications installed in TrueNAS can access the Nextcloud UI Apps section to find the Collabora Online application.
After installing Collabora Online, navigate to the Collabora Online tab in Nextcloud and enter your Collabora server address in the Collabora Online server field. This integrates Collabora and Nextcloud accounts, enhancing document access and editing capabilities.
For more details on installing Collabora, visit the Collabora TrueNAS tutorial.


